Nail prints are a cool nail art design! It’s very simple to operate and just takes a little more practice to get to perfection. In this blog, your nail supply expert Maryton made a step-by-step guide for you, which help you easily create your nail design with nail art stamping.
1. Preparing the workplace
To avoid contamination on the table, you should place newspaper, kitchen paper or cosmetic wipes underneath.
2. Apply base coat
After careful preparation, apply the base coat of your choice as full coverage on your nail. Let the product dry completely so that it becomes the perfect base for your subsequent work.
3. Apply top coat
Apply a top coat after the base coat and let dry. The top coat protects your base coat and allows you have perfect nail art stamping.
4. Prepare the model
Apply the dabbing lacquer of your choice to the edge of the stencil and use the scraper to quickly draw it onto the stencil with a little pressure to completely fill in the depressions in the design.
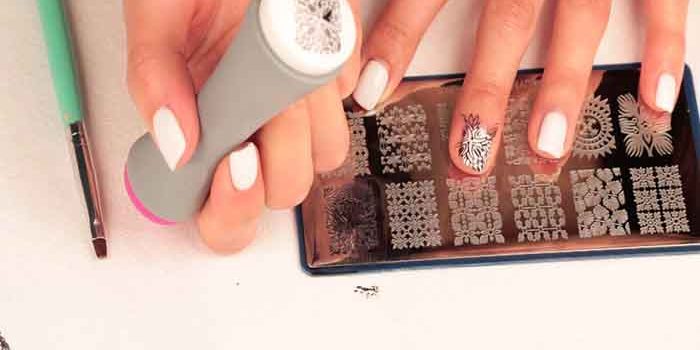
5. Prepare the stamp
Now press down with a slight rolling motion on the entire design so that the entire design is transferred to the stamp.
6. Pattern of the game
Then place the stamp on the desired area of your nail and roll it with light pressure to set the design.
7. Clean the edge of the nail
If nail polish has come off your pattern on the cuticles, clean them with nail polish remover and a cotton swab.
8. Top Coat to seal
Finally, apply the top coat over your nail art stamp to seal, protect and give your nail design a flawless shine.
In addition, I advise you to invest in a complete manicure kit to care for your nails!
Read also: Stamping Nail Art: 3 questions for the expert
 Tips to Extend the Life of Your Stamping Nail Art Stamping nail art is an innovative nail art technique that allows you to embellish your nails with elaborate and precise designs. Using special metal or silicone plates, engraved with different designs, stamping offers a simple and effective way to create sophisticated designs. After taking the time to create a beautiful stamping…
 How to create your triangle nail art manicure? No need to go to the manicurist to adorn your triangle nails, you can do it at home. It is very simple. In this article, the nail supply expert Maryton will tell you how to create your triangle nail art manicure. Keep reading! All you need to do is arm yourself…
 How do I apply my manicure products correctly for a uniform… Applying your manicure products correctly for a uniform and smooth result can be an exciting process, but it can also be confusing with suboptimal and poor results. What should you do? Don’t panic, the nail expert Maryton will give you several useful tips. Clean your nails: Before applying nail polish, make sure…