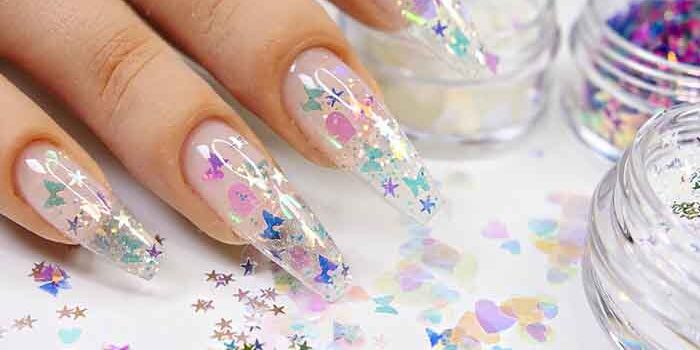
For ultra glamorous and feminine nails, what if you use acrylic resin on stencil? Nail stencil application is a completely natural technique to go from short nails to a perfect manicure. In this article, Maryton Nail Supply will tell you the installation of acrylic resin on stencil. Just keep reading!
Nail preparation
Start filing on the free edge of the nail to correct small imperfections and irregularities. Then, dust the nails using a nail brush. Finally, apply Nail Prep to natural nails to dehydrate and degrease so that the resin can adhere to them.
Before applying the resin, it is necessary to apply the adhesives to the fingertips. Apply acrylic nail products in a very thin layer to all nails. Cure under an LED device. File on top and sides of nails to shape for a clean extension.
Application of semi-permanent varnish
Apply a very thin layer of semi-permanent varnish, stretching it well to the free edge. The first layer should be translucent, dry everything under the UV/LED lamp. We apply a second thin layer of semi-permanent varnish to assert the color, pass once again under the UV/LED lamp. Finally, apply the top coat and again under UV/LED lamp.
Conclusion
Applying acrylic resin to stencil is therefore a technique that allows you to highlight your nails with a more natural impression than applying resin to capsule. Treat yourself to a stencil beauty treatment to extend your femininity to the tips of your nails. In addition, I recommend investing in some professional manicure sets to care for your nails.
Read also: Base coat: what is it and what is it for?
 How to achieve a French manicure? Coming from the United States, the “French manicure” designated French elegance and refinement. In this article, Maryton Nail Supply will tell you how to achieve a French manicure. Just keep reading! French manicure refers to a technique allowing you to beautify your nails and therefore your hands or feet with a neat…
 Semi-Permanent Nail Polish Professional Application At Home! As we all know, semi-permanent nail polishes will revolutionize your manicure. Ultra-easy installation, long-lasting hold and a uniform finish. In this article, Maryton nail supply will show you how to achieve a quality manicure at home. STEP 1: BASIC Apply the base coat to all the fingers of the first hand, in a thin layer and without…
 UV nail lamp, what is it for? On natural nails or false nails, a well-applied varnish enhances the hands and highlights them. To successfully apply false nails and/or semi-permanent varnish, professionals use UV nail lamps. However, what is this equipment used for? Keep reading, Maryton nail supply will give you answers. The UV nail lamp is used in some…