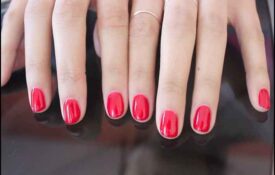
Do you love having colorful mimine but you don’t have much time to devote to it? Opt for semi-permanent varnish. Maryton provides you with a protocol for the semi-permanent step by step that will allow an irreproachable installation between 3 to 4 weeks!
Materials needed:
- Nail file
- Buffing block
- Cuticle pusher
- Super Primer
- Base and Top Coat
- Paint color of your choice
- Catalyst UV or LED lamp
- Cuticle oil
Laying the semi-permanent
- First, edge the free edge of your nails to shape them, then push back the cuticles.
- For better adhesion of the semi-permanent varnish and to make your nails more porous, polish the nails using the nail buffer.
- Apply the Super Primer in a very thin layer and let air dry for 10 seconds.
- Then apply a thin layer of Base and catalyze under the nail lamp.
- Start by applying a thin layer of semi-permanent varnish without touching the cuticles or the skin around the nails.
- Apply a second thin coat of semi-permanent varnish and catalyze again.
- Finally, apply a final layer of top coat and catalyze.
- Apply and spread the cuticle oil on each nail.
Now that you’ve know how to apply semi-permanent varnish step by step, you can use gentle manicure kits to begin your manicure!
Read also: A Privileged Moment Of Home Manicure


